


Hey there, fellow tattoo enthusiasts! I'm a supplier of wireless tattoo machines, and today I'm gonna walk you through the process of assembling a wireless tattoo machine. Whether you're a newbie just starting out in the tattoo game or a seasoned pro looking to fine - tune your setup, this guide is for you.
First off, let's talk about why wireless tattoo machines are so great. They offer a lot more freedom of movement compared to their wired counterparts. You don't have to worry about cords getting in the way or limiting your range of motion while you're creating those amazing works of art on your clients' skin.
Gather Your Tools and Parts
Before you start assembling, make sure you have all the necessary tools and parts on hand. You'll typically need a small set of screwdrivers (both Phillips and flat - head), a pair of pliers, and some lubricant. As for the parts of the wireless tattoo machine, you should have the main body of the machine, the motor, the needle bar, the needles, the power source (usually a battery), and any additional accessories like grips or tips.
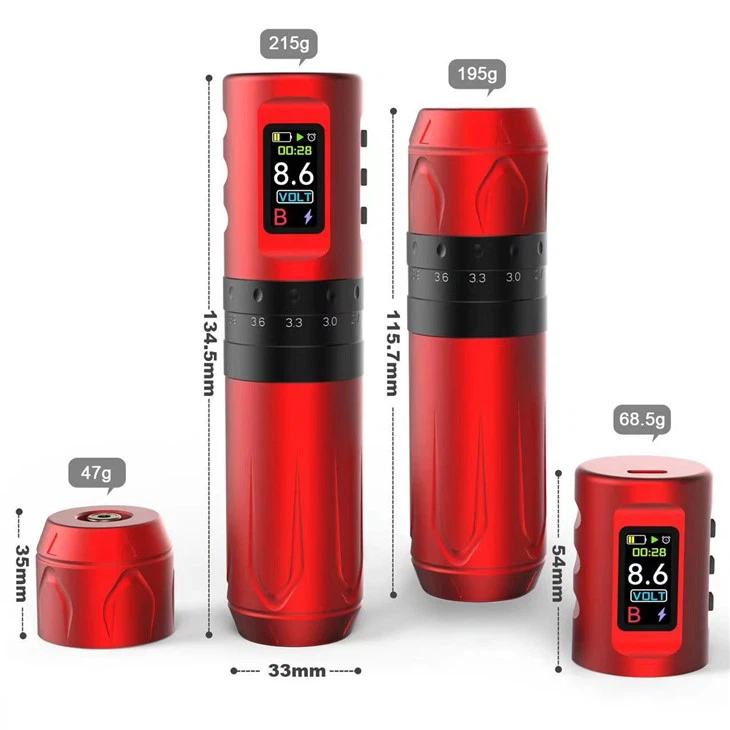
Let's start with the main body. This is the base of your tattoo machine, and it's where everything else will be attached. Take a close look at it and familiarize yourself with all the different holes and slots. Some wireless tattoo machines come in a sleek pen - like design, such as the Wireless Tattoo Rotary Machine Pen. These are really handy because they're easy to hold and maneuver, especially for detailed work.
Install the Motor
The motor is the heart of the tattoo machine. It's what makes the needles move up and down. Carefully insert the motor into the designated slot in the main body. Make sure it fits snugly and that there are no loose connections. You might need to use your pliers to gently push it into place if it's a bit tight. Once the motor is in, use the screwdriver to secure it with the provided screws. Don't over - tighten the screws, though, as this could damage the motor or the body of the machine.
Attach the Needle Bar
Next up is the needle bar. This is the part that holds the needles. Slide the needle bar into the opening on the front of the machine, near the motor. There should be a small locking mechanism or a screw that you can use to keep the needle bar in place. Tighten it just enough so that the needle bar doesn't move around, but still allows for some flexibility.
Select and Install the Needles
Now, it's time to choose the right needles for your tattoo. Different needles are used for different types of work, like lining, shading, or coloring. Once you've selected your needles, insert them into the needle bar. There are usually small clips or holders on the needle bar that will keep the needles secure. Make sure the needles are straight and centered in the bar.
Connect the Power Source
Most wireless tattoo machines are powered by rechargeable batteries. Find the battery compartment on your machine and open it. Insert the battery carefully, making sure the positive and negative terminals are aligned correctly. Some machines, like the Wireless Tattoo Gun Machine with Two Battery, come with two batteries for extended use. This is a great feature if you're doing long tattoo sessions.
After inserting the battery, close the compartment. You should see a small indicator light on the machine that shows whether the battery is connected and charged. If the light doesn't come on, double - check the battery connection and make sure it's properly seated.
Test the Machine
Before you start using your newly assembled wireless tattoo machine on a client, it's crucial to test it. Turn on the machine and listen for the sound of the motor. It should run smoothly without any strange noises or vibrations. You can also test the movement of the needles by holding the machine over a piece of scrap skin or a test pad. Watch the needles as they move up and down to make sure they're working correctly.
Add Accessories
Once you've tested the machine and everything is working fine, you can add any additional accessories. Grips are a popular accessory as they make the machine more comfortable to hold. There are different types of grips available, from soft rubber ones to textured ones. Just slide the grip onto the body of the machine where you hold it.
You might also want to add a tip or a cap to the end of the machine. This can help control the ink flow and protect the needles. Some machines come with interchangeable tips, so you can choose the one that suits your needs best.

Maintenance
To keep your wireless tattoo machine in top condition, regular maintenance is essential. After each use, clean the machine thoroughly. Use a disinfectant solution to clean the needle bar, the needles, and the exterior of the machine. Make sure to remove any ink or debris. You can also lubricate the moving parts of the machine, like the motor and the needle bar, with a small amount of lubricant. This will help keep the machine running smoothly and extend its lifespan.
If you're looking for a high - quality wireless tattoo machine, we also offer the Best Wireless Tattoo Gun. It's designed for both beginners and professionals, with a powerful motor and a comfortable grip.
So, there you have it! That's how you assemble a wireless tattoo machine. It might seem a bit complicated at first, but with a little practice, you'll be a pro at it. If you have any questions or need more detailed instructions, feel free to reach out. We're here to help you get the most out of your wireless tattoo machine.
If you're interested in purchasing our wireless tattoo machines or have any inquiries about our products, don't hesitate to contact us for procurement and to discuss your specific needs. We're always ready to assist you in finding the perfect tattoo machine for your studio.
References
- Tattoo Machine Assembly Guides from Industry Magazines
- Manufacturer's Manuals of Wireless Tattoo Machines


